6,476 Reasons to Fall in Love with Mera Peak (Here Are 10 of Them)

Mera Peak

Mera peak – 6,476 Reasons to Fall in Love with isn’t just a catchy phrase, it reflects the magic of standing at 6,476 meters on Nepal’s highest trekking peak, surrounded by some of the world’s tallest mountains and an experience that changes how you see the Himalayas forever.

Mera Peak is often described as the perfect introduction to high-altitude mountaineering, but that simple label doesn’t do it justice. Below are 10 powerful reasons why Mera Peak captures the hearts of trekkers and climbers from around the world.

1. Nepal’s Highest Trekking Peak at 6,476m – Mera Peak

At 6,476 meters, Mera Peak is the highest trekking peak in Nepal. While it doesn’t require advanced technical climbing skills, the altitude alone makes the achievement deeply rewarding. Reaching this height gives you a true taste of Himalayan mountaineering without the extreme technical demands of 7,000m or 8,000m expeditions.

2. One of the Best First 6,000m Peaks – Mera Peak

Mera Peak is widely considered the best first Himalayan peak. The climb involves glacier travel, basic crampon use, rope techniques, and an ice axe—making it ideal for beginners who want to step into mountaineering in a controlled, guided environment.

No prior climbing experience is required, but good fitness and preparation are essential.

3. Jaw-Dropping Views of Five 8,000m Giants from Mera Peak

From the summit, you’re rewarded with one of the widest panoramic views in Nepal. On a clear day, you can see:

  • Everest (8,848m)
  • Lhotse (8,516m)
  • Makalu (8,485m)
  • Cho Oyu (8,188m)
  • Kangchenjunga (8,586m, in the distance)

Very few peaks in the world offer such an incredible lineup in a single view.

4. A Remote and Less-Crowded Route – Mera Peak

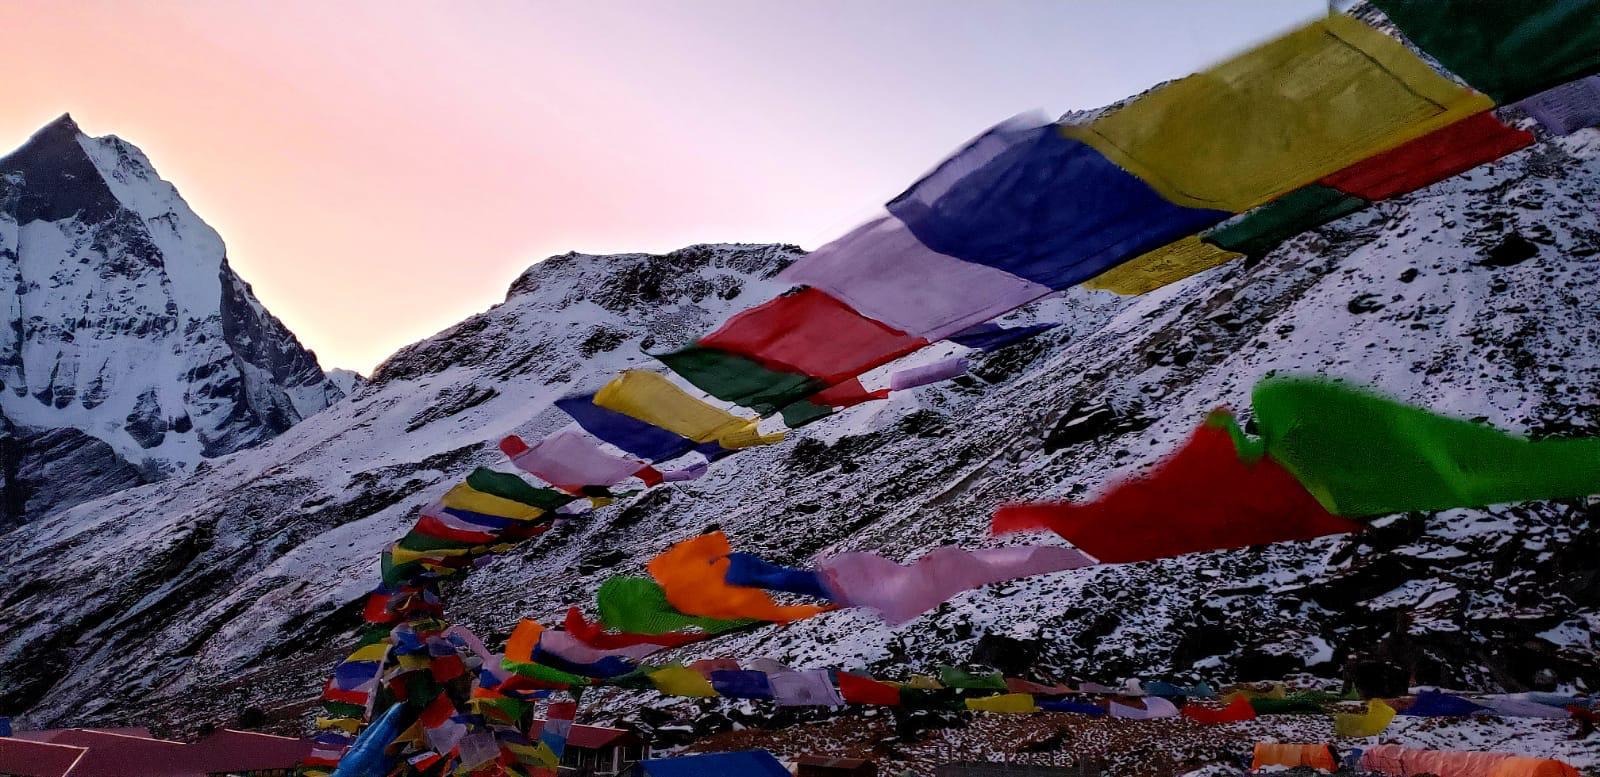
Unlike Everest Base Camp or Annapurna Circuit, this Peak route is quieter and more remote. After leaving Lukla, the trail heads into the less-traveled Hinku Valley, where you’ll experience peaceful forests, isolated villages, and untouched alpine landscapes.

This sense of wilderness is a major reason climbers fall in love with Mera Peak.

5. Gradual Acclimatization for Better Safety

The itineraries are designed with excellent acclimatization profiles. The slow ascent through villages like Paiya, Panggom, and Khote allows your body to adapt properly to altitude, reducing the risk of Acute Mountain Sickness (AMS).

Extra acclimatization days at Khare and Mera High Camp play a crucial role in summit success.

6. A True Expedition Experience without the Chaos

While still accessible, it feels like a real Himalayan expedition. You’ll stay in teahouses during the trek and transition to tented camps higher up. Fixed ropes, early-morning summit pushes, glacier crossings, and teamwork all combine to create an authentic mountaineering experience—without the extreme logistics of bigger peaks.

7. Ideal for Training and Future Big Mountains

Many climbers use Mera Peak as preparation for higher goals such as Island Peak, Ama Dablam, or even Everest. The altitude, endurance demands, and cold conditions make it excellent physical and mental training.

It builds confidence at high altitude, something no gym or lower trek can replicate.

8. Spring and Autumn Offer Near-Perfect Conditions

The best seasons for Mera Peak climbing are:

  • Spring (March–May): Stable weather, warmer temperatures, clear summit mornings
  • Autumn (September–November): Crisp air, excellent visibility, and dramatic mountain views

During these seasons, summit success rates are high when proper acclimatization and experienced guides are involved.

9. Strong Safety Record with Professional Guidance

Mera Peak has a good safety record when climbed with licensed guides and a well-planned itinerary. Professional expeditions include:

  • Experienced climbing guides
  • Fixed ropes on the summit section
  • Emergency oxygen and first-aid kits
  • Clear evacuation protocols

This makes it a responsible and safe choice for motivated trekkers stepping into mountaineering.

10. A Personal Victory That Stays with You Forever

Summiting Mera Peak isn’t just about altitude, it’s about self-belief. The long days, cold mornings, and final push in the dark test your patience and determination. Standing on the summit at sunrise, with the Himalayas glowing around you, is a moment that stays with you for life.

Many climbers say Mera Peak is the moment they truly fell in love with the mountains.

Practical Information: What You Should Know

Typical Duration

  • 13–18 days (Kathmandu to Kathmandu)

Difficulty Level

  • Physically demanding due to altitude
  • Technically moderate
  • Requires strong cardiovascular fitness

Required Permits

  • Mera Peak Climbing Permit
  • Makalu Barun National Park Permit

Accommodation & Meals

  • Teahouses during the trek
  • Tented camps above Khare
  • Hot meals prepared by support staff at higher camps

Cost Range

  • Generally, USD 2,200–3,500, depending on services, group size, and inclusions

Final Thoughts

Mera Peak is not the hardest mountain in Nepal, but it might be one of the most rewarding. It offers altitude, beauty, solitude, and challenge in perfect balance. Whether you’re a strong trekker dreaming of your first summit or an aspiring mountaineer building experience, there are truly 6,476 reasons to fall in love with Mera Peak and these 10 are just the beginning.

Guided vs Independent Mera Peak Climb: Route and Preparation Explained 2026-2027

Guided vs Independent Mera Peak

Guided vs Independent Mera Peak Climb: Route and Preparation Explained is a crucial topic for anyone planning to summit Nepal’s highest trekking peak, as the decision you make directly impacts safety, preparation level, cost, and summit success. Although Mera Peak (6,476 m) is often marketed as a non-technical mountain, the reality involves high-altitude exposure, glacier travel, unpredictable Himalayan weather, and remote logistics that require serious planning.

This complete guide explains the Mera Peak climbing route, compares guided and independent climbing styles, outlines preparation requirements, and helps you choose the option best suited to your experience and goals.

Overview of the Mera Peak Climbing Route – Guided vs Independent Mera Peak Climb

The standard Mera Peak route offers stunning scenery and gradual altitude gain, making it ideal for acclimatization when done properly.

Standard Route Breakdown

  • Kathmandu – Lukla (Flight)
  • Lukla – Paiya – Panggom
  • Panggom – Khote
  • Khote – Thangnak
  • Thangnak – Khare (Acclimatization)
  • Khare – Mera High Camp
  • Summit Day – Mera Peak (6,476 m)
  • Return via same route or optional extension

Key Route Challenges

  • Long trekking days in remote valleys
  • Glacier travel above Khare
  • Fixed rope sections near the summit
  • Cold temperatures and high winds
  • Limited rescue infrastructure

While the route itself is straightforward, how you approach it—guided or independently—makes a major difference.

What Is a Guided Mera Peak Climb?

A guided Mera Peak climb is led by a licensed climbing guide, supported by assistant guides and porters. This option is designed for trekkers transitioning into high-altitude mountaineering.

What’s Included in a Guided Climb

  • Climbing permits and paperwork
  • Domestic flights and ground logistics
  • Experienced guide and support staff
  • Accommodation and meals
  • Pre-climb training at Khare
  • Fixed ropes and glacier safety systems
  • Emergency and evacuation coordination

Preparation for a Guided Mera Peak Climb

  • Good trekking fitness
  • Prior high-altitude trekking (4,500–5,500 m recommended)
  • Willingness to follow acclimatization schedules
  • No technical climbing experience required

Pros of a Guided Climb

  • Higher summit success rate
  • Professional altitude monitoring
  • Reduced logistical stress
  • Emergency response support
  • Ideal for first-time 6,000 m climbers

Climb with certified guides, proper acclimatization, and full logistical support.

What Is an Independent Mera Peak Climb?

An independent Mera Peak climb means organizing permits, logistics, and safety yourself—without a professional guide.

Preparation Requirements for Independent Climbers

  • Strong high-altitude experience
  • Glacier travel and crevasse rescue skills
  • Rope handling and crampon proficiency
  • Navigation and weather assessment ability
  • Emergency decision-making skills

Pros of an Independent Climb

  • Full control over pace and itinerary
  • More flexible acclimatization
  • Lower upfront cost
  • Strong sense of self-reliance

Risks of Independent Mera Peak Climbing

  • Higher exposure to altitude illness
  • No professional safety oversight
  • Complicated permit and rescue logistics
  • Lower margin for error in extreme conditions

Independent climbs are best suited for experienced alpinists, not first-time Himalayan climbers.

Guided vs Independent Mera Peak Climb: Key Differences

FactorGuided ClimbIndependent Climb
SafetyHighModerate to Low
LogisticsFully managedSelf-managed
Skill RequirementModerateHigh
Success RateHighVariable
FlexibilityModerateHigh
Best ForFirst-time climbersExperienced alpinists

Mera Peak Packing List – Guided vs Independent Mera Peak Climb

Clothing

  • Thermal base layers (top & bottom)
  • Fleece or light insulated jacket
  • Down jacket (–20°C or lower)
  • Waterproof shell jacket & pants
  • Insulated gloves (inner & outer)
  • Warm hat, buff, balaclava

Footwear

  • Double or insulated mountaineering boots
  • Trekking boots
  • Gaiters
  • Wool socks (4–5 pairs)

Technical Gear

  • Crampons
  • Ice axe
  • Harness
  • Helmet
  • Ascender (Jumar)
  • Locking carabiners
  • Tape slings (120 cm & 240 cm)
  • Headlamp with spare batteries

(Most guided climbs provide shared technical gear, but personal-fit items are recommended.)

Essentials

  • Sleeping bag (–20°C comfort)
  • Sunglasses (UV400 / Category 4)
  • Trekking poles
  • Water bottles or insulated flasks
  • Personal first-aid kit
  • Sunscreen & lip balm (SPF 50+)

12-Week Training Plan for Mera Peak

Weeks 1–4: Base Fitness

  • Cardio 4–5 days/week (45–60 min)
  • Strength training (legs & core)
  • Weekend hikes with light pack

Weeks 5–8: Strength & Endurance

  • Longer cardio sessions (60–90 min)
  • Stair climbing with backpack (8–10 kg)
  • Weekend hikes (5–7 hours)

Weeks 9–12: Peak Conditioning

  • Long hikes with elevation gain
  • Back-to-back training days
  • Pack weight 10–12 kg
  • Taper in final week

Optional but recommended: basic mountaineering or crampon skills training.

FAQs – Guided vs Independent Mera Peak Climb

Is Mera Peak suitable for beginners?
Yes, with a guide. It’s one of the best first 6,000 m peaks when climbed responsibly.

Do I need technical climbing experience?
Not for guided climbs. Independent climbers must already have glacier skills.

How long is the expedition?
Typically 16–18 days including acclimatization and contingency days.

What is the best season?
Spring (April–May) and Autumn (October–November).

How cold does it get?
Up to –25°C with wind chill on summit day.

Final Thoughts: Which Option Should You Choose? Guided vs Independent Mera Peak Climb?

Choosing between a guided or independent ascent defines your entire Mera Peak experience. While independent climbing offers freedom, a guided Mera Peak climb provides safety, structure, and a far higher chance of standing on the summit—especially for first-time climbers.

Preparation, patience, and respect for altitude matter more than speed or strength.

Guided vs Independent Mera Peak? What do you Think? Inquire Now